They usher visitors towards a specific call to action. 1. 2. For instance, you may have created the newest must-have app, service, software, or even a networking opportunity for artists worldwide. 3. If you have a gree-related business, potted plants, or gardening, it’s easy to jump on this one. 4. Modern is a simple, direct template that can easily be customized to suit any purpose. 5. It’s a flexible, simple design that allows businesses to promote their popular products. 6. The template allows you to show all your products in one place. It’s easily one of the best landing templates when having a sale. 7. It’s a simple design that lets your product image speak for itself. The design is quite flexible, and you can build almost anything based on this template. 8. The themed lead generation template has placeholder images and text that you can use. You can also use the drag and drop editor if you’d like to add your content. 9. The primary goal of this template is to encourage every visitor to sign up, so the content block “sign up” is the attention grabber. A landing page is highly focused and targeted on a single specific outcome. The goal of a landing page is to promote a predetermined action through a targeted message to connect with a visitor and persuade them to take action. To Showcase Your Products And Services. Landing pages offer an excellent platform to showcase and promote your products to new and existing customers. To Grow Your Potential Audience. To Build Your Brand And Create Awareness. Templates that allow customer testimonials dramatically boost your credibility too. To Boost Your Sales And Profits. Like web pages, landing pages can offer you valuable insights that you can use to double down or re-direct marketing efforts. To Keep Sending Reminders To Your Audience To Stay Connected.
Click the ‘campaigns tab”, then click on the ‘create campaign option.’ You’ll be prompted by a pop-up window to select one of the five options. The next step will be selecting a template for your landing page. Consider the purpose of your landing page when picking a template to help you choose the one that suits the purpose best. The landing page builder will present you with an array of options to customize your landing page. You’ll be able to edit text, add buttons, images, products, and even payment options. You can tweak the individual images and colors in the design panel too. The first step in the overview stage is to provide a title for your landing page - this is what will appear in your browser’s title bar. Your URL should be something that suggests what your landing page is about. The final step will be setting up how the landing you just created will be tracked. You’ll find the options in the settings & tracking option (by scrolling down on the same page). Every tool will allow you to enjoy slightly different benefits. Once you have chosen how you’d like to track your results, click on the ‘save’ button, then find the ‘publish’ button, and voila! And for free. Therefore, it is 100% focused on conversion. Generate sales: eCommerce usually use them to highlight a product, a novelty or offers. They collect all the necessary information to get the user to buy quickly, and decision accelerators such as “Last days”, “Only for a limited time” or “Only available for the first 50 buyers” are also often used. Generate leads: obtain the visitor ‘s data through a form. Obviously, whoever gives their data is in exchange for something. Either a webinar, a course, a demo, a discount, etc. You already know that in these cases, the conversion rate is inversely proportional to the amount of information we require, i.e. the more fields the form has, the lower the number of conversions, so think carefully about what information you will need to improve your marketing campaigns. Unfortunately, we tend to ask for more information than we really need.
You will work with the same simple and intuitive interface of the tool to create your newsletters. So if you’ve already done your first campaigns or you’ve mastered the automations, it won’t be a problem for you. A new window will appear where you can choose Create a landing page (bottom right). After choosing the landing page option, the window will change again and you will be able to choose between Signup page or Product Page in the top menu. The first one will be used to collect information from your subscribers and the second one to get more sales, announce new products, etc. We are going to choose Signup Page. We will use the Mad4Madrid account, taking advantage of the fact that they are going to organize a wine and tapas tasting event. 4. 5. Customize each of these elements. A trick is to open a draft campaign in another tab and take the different elements such as fonts, etc. from the HTML version. You can also add other elements that you consider necessary for your page. We have included an image and used 2 columns for the text block to highlight the most important data of the event. We have also customized the color of the button. Once the landing page is ready and to our liking, click on Save and Continue at the bottom right. The next screen will show us some editable options such as the page title and URL, the list, or a button to return to the content editor. At the top we have the Publish option in the form of a button to publish and Finish later to exit and leave the page in draft (you can find it next to your campaigns). If you decide to publish, just click the Publish button and your new landing page will be published with a personalized URL based on the name you have given it. Usa il tuo dispositivo mobile per creare rapidamente una pagina di destinazione quando sei in giro.
Ecco alcune cose da sapere prima di iniziare. Hai appena cominciato? Tocca l’ icona della matita nell’angolo in alto a destra. Tocca “Create a Landing Page” (Crea una pagina di destinazione). Tocca Imposta il mio logo per aggiungere un logo alla pagina di destinazione. Se non vuoi includere un logo, tocca Salta e procedi al passaggio 6. Scegli o carica una foto, quindi tocca Avanti per continuare la personalizzazione della pagina di destinazione. Aggiungi un breve testo per comunicare agli utenti chi sei e di cosa ti occupi, quindi tocca Avanti per continuare. Tocca Modifica testo pulsante, quindi inserisci il testo descrittivo. Seleziona lo stile e i colori del pulsante per personalizzare il design della pagina di destinazione. Tocca Aggiungi immagine per scegliere una foto di uno dei prodotti più venduti o di qualsiasi altra cosa tu voglia mostrare sulla pagina di destinazione, quindi tocca Avanti per continuare. Ora, dovrai scegliere in che modo desideri che i tuoi clienti ti raggiungano, tramite social o piattaforme di pagamento. Tocca il cursore per ogni piattaforma che desideri inserire, quindi inserisci le informazioni di contatto nella schermata a comparsa. Ora è il momento di revisionare la pagina di destinazione. Se sembra corretto, tocca Invia o Indietro per apportare modifiche. Potrebbe essere necessario accettare alcune condizioni aggiuntive. Inserisci il titolo della pagina di destinazione nella casella Titolo della pagina, quindi tocca Trattieni per pubblicare la pagina di destinazione. Perfetto! La pagina di destinazione è stata pubblicata ed è pronta per essere visualizzata o condivisa. Puoi annullare la pubblicazione della pagina di destinazione in qualsiasi momento. Tocca Annulla pubblicazione, quindi premi Tocca e tieni premuto per confermare. Tocca la pagina di destinazione pubblicata che vuoi condividere. Tocca l’URL, quindi scegli come condividere la tua pagina di destinazione. Apre la pagina di destinazione in Safari. Monitora le prestazioni della tua pagina di destinazione sul tuo dispositivo mobile o attiva le notifiche per ricevere aggiornamenti automatici. Sei pronto per far crescere la tua lista contatti? Vuoi aumentare le vendite del tuo e-commerce? La landing page è una pagina, letteralmente, di “atterraggio“, ovvero dove l’utente atterra solo dopo aver cliccato su un banner di Google AdWords o annunci a pagamento simili. Le landing pages hanno un singolo obbiettivo che si traduce nella Call To Action (CTA), per questo motivo sono lo strumento più efficace e che converte meglio nelle campagne a pagamento.
Questo permette ai marketers di concentrarsi e sviluppare le campagne anche con obiettivi a breve termine. Per esempio, quando si ha bisogno di promuovere dei prodotti per un tempo limitato o svendere delle rimanenze. Una pagina di atterraggio è molto semplice da creare: nel builder dedicato alle landing si possono fare le grafiche e configurare le pagine. Se hai più landing page attive saprai esattamente quale campagna ha prodotto quanti contatti. Il secondo ti aiuta a promuovere e vendere i tuoi prodotti. La struttura predefinita di questo tema è composta da un blocco in cima dove inserire il proprio logo e un altro dove inserire i contenuti riguardanti il prodotto.
Consigli: - usa questo tema per vendere e promuovere prodotti o servizi oppure per pubblicizzare un’offerta o sconto - inserisci un prodotto presente nel tuo negozio online - rifinisci la pagina in modo da darle lo stesso stile del tuo brand - personalizza lo slogan di vendita
Entrambi i templates sono personalizzabili: puoi spostare, aggiungere o eliminare i vari blocchi, oltre che personalizzarli in modo che lo stile sia il medesimo del tuo brand. A lui va il compito della coerenza tra i messaggi. Una frase a supporto del titolo principale: pur rimanendo coerente col messaggio fornisce altre informazioni e attirare l’attenzione del cliente. Un’affermazione di “rinforzo”: viene posta nella parte centrale della landing e ha lo scopo di mantenere alto l’interesse dell’utente.
La Call to action (CTA). Inserisci in alto nella pagina la tua CTA, il tuo unico obiettivo di vendita o di generazione di traffico. Ecco perché: Templates semplici e per ogni esigenza. Partendo da un template standard, lo si può personalizzare a proprio piacimento, combinando i vari blocchi di grafica e testo. Per crearla basta seguire questi semplici passaggi: Dopo esserti loggato, cerca nella parte in alto a destra o il tasto “Create” o il pulsante “Create Campaign” e clicca uno dei due pulsanti oppure Da entrambi i pulsanti ti si aprirà la stessa schermata. Fai click su “Create a Landing Page”.
Usa le tabelle e scegli il template adatto per la tua landing: SignUp Page: per generare traffico e creare nuovi contatti; Product Page: vendita e promozione dei tuoi prodotti. Nella parte di “Design a landing page”, inserisci il nome della tua landing e seleziona “Select a list” oppure “Select a store”. Inseriti questi dati clicca “Begin”. NB: Tieni presente che il nome che andrai ad inserire non sarà visibile online, è un nome che usi per tuo personale promemoria. Ora sta a te editare la tua landing: usa il drag and drop e personalizza il contenuto della tua pagina. No coding or e-commerce store required. Already have an online presence?
Stay connected and engaged with your customers with the help of our all-in-one Marketing Platform. Grow your online business with our trusted all-in-one Marketing Platform Our channels and digital marketing tools can help your business deliver the right message to the right people at the right moment. Need more advanced options? The more people you refer, the more you both can save. Ready to get started? You’ll be up and running in no time. A landing page is a standalone web page built around a single goal, such as collecting contacts, selling a product, or promoting an offer. Unlike a homepage, it has no navigation menu or competing links pulling visitors in different directions. Every element on the page points toward one action.
Come Funziona Mailchimp? - Guida Pratica per Principianti
Questo testo spazia tra concetti chiave: continuous improvement, tracking, pubblicazione, gestione campagne e analisi. Per creare una landing page efficace è cruciale avere una chiara separazione degli obiettivi e una CTA dominante. Analisi post-pubblicazione aiuta a calibrare campagne future e a capire quali contenuti funzionano meglio per segmenti specifici di pubblico.
Utilizzo pratico: dal concept alla pubblicazione
First, name your new landing page and choose an audience. If your landing page includes a signup form, new subscribers will be added to this audience. Type a name for your landing page. This name is for your reference, and isn't visible to visitors. Click the Audience drop-down, then select an audience. Click Begin. Great work!
In breve, una landing page ben progettata con Mailchimp consente di mostrare prodotti o servizi, generare lead e guidare gli utenti verso una CTA mirata, utilizzando template semplici ma potenti, strumenti di drag-and-drop, tracciamento e pubblicazione agevole, il tutto integrato nell’ecosistema di marketing dell’azienda.
Elementi chiave da ricordare
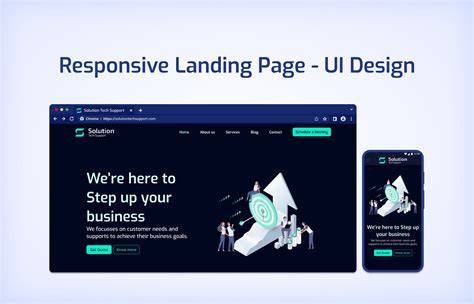
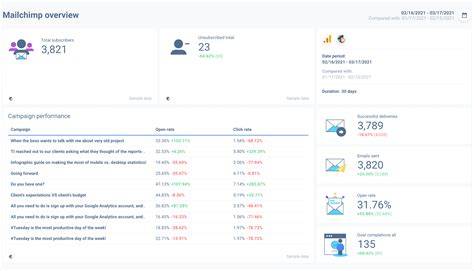
Mobile-responsive design: una pagina che sembra rotta su un telefono perde visitatori rapidamente. Lead generation landing pages: raccogli contatti tramite un modulo. High-converting landing pages: chiarezza, un solo obiettivo, una CTA unica. Tracking e analisi: metriche di views, clicks, signups e revenue in un unico posto. Drag-and-drop builder: aggiungi testo, immagini, prodotti e moduli di iscrizione senza coding. Publish: quando sei pronto, pubblica.